Lobiloo is proud to offer 1-click payments from your clients, deposited directly into your bank account.
How it works
- Connect your bank account or debit card to Lobiloo (one time only)
- Create an invoice/estimate with Lobiloo
- Clients pay you, directly from your estimate
Let's walk through each step in more detail.
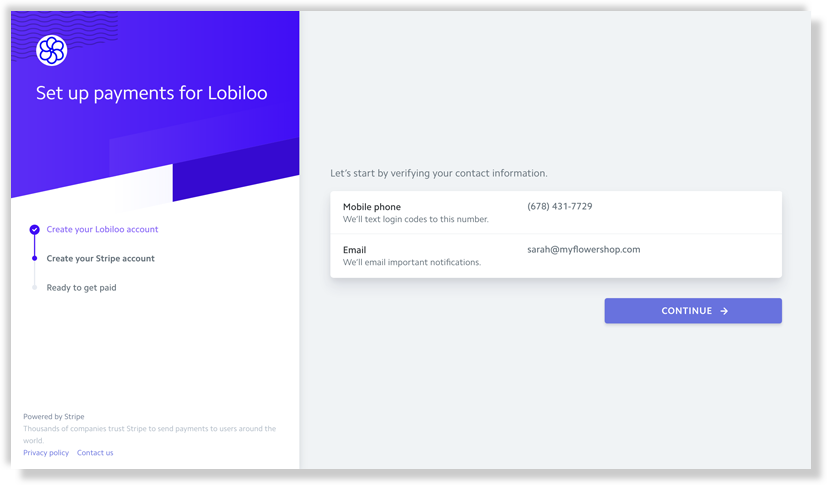
Connect your bank account
Lobiloo works with Stripe.com to safely store your banking information. Lobiloo does not store any of your bank details on our server.
To connect in 90 seconds, visit your Lobiloo user profile and select Payable Invoices in the Advanced Features section.

Clicking "Get Started" will redirect you to Stripe, where you'll answer a couple questions to set up your business profile.
Step 1
Step 2

Step 3

Tip: if you fill out your Lobiloo user profile first, most of these fields will be pre-populated for you.
Create an invoice with Lobiloo
Per usual, create an event, add arrangements, calculate your costs, and prepare your estimate.
If you've connected your bank account in the step above, at the bottom of your Estimate tab will be a checkbox to "include a clickable payment link."
Check this box, download the invoice, and share it with your client.
Get paid by your client
At the bottom of your PDF estimate, below the Grand Total section, will be a link to pay the invoice.
When your client clicks the link, they'll land on a page like this:

This page will be unique to that client's invoice and contain your logo, company name, and their total amount due. Clients may input a credit card to pay you.
After paying your invoice, clients will land on a thank-you page. In the near future you'll be able to customize this thank you page, or redirect clients to your own website.
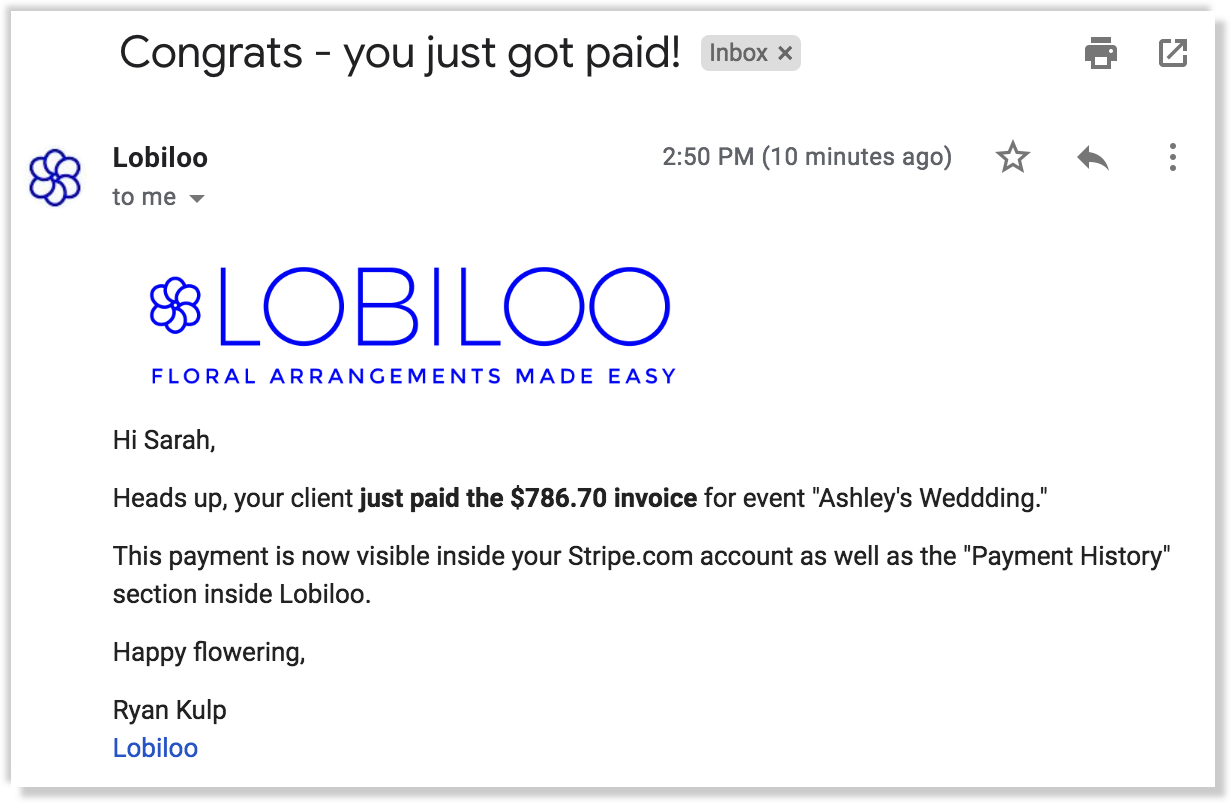
You'll be instantly emailed about the payment so you can reach out with further instructions.
Deposits to your bank
You'll be paid via direct deposit on a rolling 2-day basis, after relevant credit card and transaction fees are deducted from the client payment.
After a few successful payments, you may become eligible for overnight deposits.
To learn more about payable invoice fees, go here.
Recording payments inside Lobiloo
All client payments will be available in your Lobiloo event's "Payment History" section, accessible at the bottom of your Event > Estimates tab.

The charge ID will be included so you can easily reference the payments in your accounting software.
Feedback? Questions?
We're here to help, email us anytime at [email protected] or chat with us live at lobiloo.com.